- Difficulty
- Beginner hardware
- Time
- 15 min
- Guidance reference
- App 0.2.0 beta · firmware 0.6.1 · PBLE/1
Historical screenshots retain the firmware versions and App state captured at the time; they have not been retaken on firmware 0.6.1.
Prerequisites
- A Raspberry Pi Pico 2 W provisioned with its exact profile
Outcomes
- Use the named onboard LED safely
- Run finite LED patterns designed for the exact Pico 2 W profile
- Recognize that firmware 0.6.1 does not claim NeoPixel on this profile
Release-aware guidance
Compatibility
The guidance reference above is not a promise about the installer currently being served. Confirm the active version, exact profile, and enabled action on the current firmware and flash page before provisioning or changing hardware.
Qualified firmware describes firmware evidence. The table below describes this lesson's scope; it does not turn designed compatibility into hardware validation.
| Firmware profile | Lesson scope |
|---|---|
Classic ESP32 (4 MiB)esp32-4mb | Not applicable |
ESP32-S3 N16R8 · lean genericesp32-s3-n16r8 | Not applicable |
Waveshare ESP32-S3-LCD-1.47Bwaveshare-esp32-s3-lcd-147b | Not applicable |
ESP32-C3 (4 MiB)esp32-c3-4mb | Not applicable |
Raspberry Pi Pico 2 Wrpi-pico2-w | Exact board only |
This exact-board lesson is only for Raspberry Pi Pico 2 W. Firmware 0.6.1 exposes its named onboard LED surface; it does not claim NeoPixel support for this profile.
Before you begin
Complete Setup and Hardware safety, then remove any external circuit. The exact onboard LED needs no wiring, resistor choice, or numeric pin. A board with a similar name is outside this lesson.
Pico 2 W connected over BLE
Board 3DCB reported the rpi-pico2-w runtime token in this maintained physical session. Keep the exact physical marking and UF2 installer record alongside this app observation.
PyBLE-3DCB Raspberry Pi Pico 2 W
Ready observation Runtime token ·
rpi-pico2-w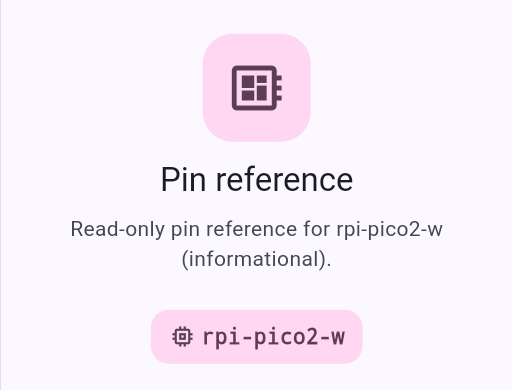
Maintained physical-session record: exact Pico 2 W. Keep the physical marking and UF2 installer record as the profile evidence.
Provision once, then work over BLE
- Computer + BOOTSEL
Select the exact Pico 2 W profile and copy its verified UF2 to the mounted volume.
- Tablet + PBLE/1
Reconnect in PyBLE over Bluetooth for editing, Files, Run, and Console.
- Named onboard LED
Use Pin("LED") only on the verified Pico 2 W and keep every blink finite.
Exact immutable sources
Both entries below are development-only and not HIL-validated. Read each complete file at the reviewed commit before importing it.
Follow in order
Tutorial steps
Confirm the exact board and firmware profile
Read the physical board label and confirm it is an exact Raspberry Pi Pico 2 W, not Pico W or another RP2350 carrier. Confirm your own installer record names
rpi-pico2-w, then verify the connected board ID, agent firmware, chip, and MicroPython are consistent with that board. DeviceInfo does not report the provisioning profile, and an RP2350 chip identity cannot distinguish an exact carrier.Stop if: the physical product or installer record is uncertain, or any reported identity field is inconsistent with the recorded Pico 2 W installation.
Know the recovery path before changing code
Pico 2 W provisioning uses an exact UF2: hold BOOTSEL while connecting USB, copy the selected UF2 to the mounted volume, and let the board restart. This is different from ESP Web Serial and requires a computer.
Expected: you can identify BOOTSEL and explain where the exact Pico 2 W UF2 comes from before continuing over BLE.
Review the named LED surface
The exact-board examples use
Pin("LED"), the documented MicroPython name for the Pico 2 W onboard LED. Do not replace it with a numeric GPIO copied from another Pico family board. No external wiring is required.Expected: the source names LED and has a finite duration plus a final off state; it contains no guessed numeric LED pin.
Import the finite onboard LED example
In a disposable child folder, pin the examples repository to the reviewed commit, browse to the Pico 2 W onboard LED folder, select its ordinary Python file, and verify the exact source and board target.
Expected: the terminal import result reports one exact file and Files refreshes without opening or running it.
Read, run, and observe the bounded blink
Open the imported source, check the blink count and timing bounds, then choose Run explicitly. Keep Console visible and be ready to press Stop. The source's cleanup leaves the LED off after completion or interruption.
Expected: the exact onboard LED blinks the documented finite count, Console reports completion, and the LED finishes off.
Try only a bounded pattern change
Open the separate Pico 2 W LED Patterns source or reduce the first example's documented count. Keep its total duration within the source limits, Save, Run explicitly, then Stop and verify the LED is off.
Stop if: a proposed edit removes validation, cleanup, the finite duration, or the exact named LED surface.
Need recovery help?
Stop at the current step, record the exact profile, board identity, app and firmware versions, and the first useful error. Then use the PyBLE support and recovery guide.